Sakura Tools
A bundle of powerful batch processing tools for character modeling and rigging
Overview
Sakura Tools is a toolkit designed to dramatically improve the workflow of character modeling and rigging, especially for those who create NPR (non-photorealistic rendering) characters intended to be taken out of Blender to external applications.
This add-on provides features designed to enable rapid iterative adjustments and efficient improvement work for character models composed of many objects.
In addition, the add-on is designed to solve the work of exporting created models out of Blender, which generally requires many operations such as applying modifiers. As a result, the hassle of exporting models with various modifiers is no longer a bottleneck, and it is possible to build a workflow that maximizes the use of Blender's features.
Features
The biggest feature of this add-on is that it supports batch processing in almost all functions.
In almost all functions, you can execute batch processing for multiple objects or bones. In particular, it treats an armature and the mesh objects deformed by it as a unit called a "model" and can execute many functions targeting the model.
For example, when you execute the "Batch Apply Modifiers" function with an armature selected, the operator is launched targeting all mesh objects associated with the armature, that is, the "model". This eliminates the need to select objects and allows you to complete the necessary work with a few operations.
For complex or time-consuming operations, a setting screen is opened first, where you can set and confirm the details before executing the operation, minimizing mistakes and rework.
In addition, many functions have a "Redo" mode, which allows you to reuse the previous settings to repeat the same operation. This allows you to instantly readjust related objects in response to modifications to the base model.
Function Overview
Sakura Tools has many functions and is classified into three categories.
Modeling Helpers
Empowers work in Object Mode and Mesh Edit Mode.
- Object Tools
- Functions targeting objects such as batch renaming, batch property settings, and adding objects to models
- Modifier Tools
- Functions targeting modifiers such as Auto Mirror, Auto Solidify, and batch add/apply/delete modifiers
- Pose Bake Tools
- Pose bake function, create shape keys from poses
- Mesh Data Tools
- Functions targeting mesh data such as weight transfer, attaching custom normals, and cleaning mesh data
- Mesh Edit Tools
- Functions to streamline mesh shape editing such as temporary shrinkwrap, quick lattice, and decal object creation/management
Rigging Helpers
Empowers work in Pose Mode and Armature Edit Mode.
- Renaming
- Search and replace bone/vertex group names, switch naming schemas, and more
- Structure
- Detects deform bones, symmetry checks, and other features to help analyze and tweaking armature structure
- Hierarchy
- Unique functions to manipulate bone hierarchy, such as insert parent bone, etc
- Placement
- Align, adjust direction, length, and other functions to place bones precisely
- Bone Creation
- Create bones from Edge selection in Mesh Edit Mode. More features in development.
- Rig Creation
- Functions to create rigs such as Twist, Eyelid, Dualjoint rigs, etc
- Constraint
- Function to create/manage constraints and drivers, including copy/mirror constraints as well as drivers
- Controller
- Create controllers for bone chains. More features in development.
Scene Data Utilities
Helps manage scene data such as Images, Models, and more.
- Image Checker
- Check and manage images within the scene, resolve duplication, find users, batch set color space, and more
- Model Change Checker
- Create revision stamp on your model, check changes from last revision, and more
- Data Cleaner
- Detects and cleans up unused, but still remaining within the workspace.
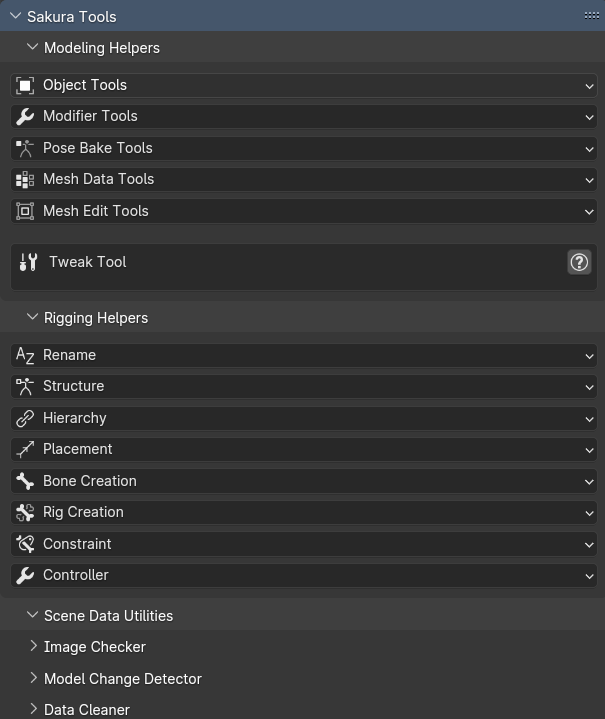
User Interface
The main panel of Sakura Tools is located in the 3D Viewport's sidebar, Sakura tab. The panel is divided into three categories: "Modeling Helpers", "Rigging Helpers", and "Scene Data Utilities".
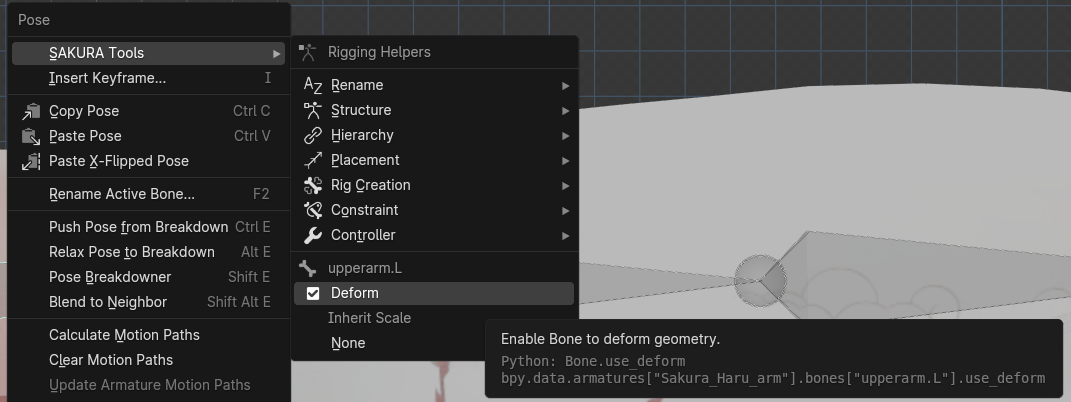
And each features also added to the context menu. You can access the features by pressing w key in the 3D Viewport, and look for the "Sakura Tools" submenu. Almost all features are accessible from here.
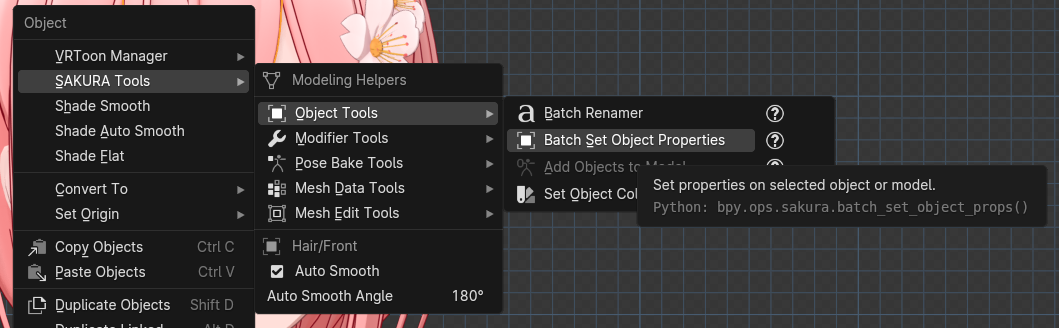
Additionaly, quick access buttons are provided on the submenus for frequently used properties of objects and bones.
Redo Mode
Many features that require complex settings have a "Redo" mode. In the "Redo" mode, the previous settings are used, so you can repeat the same operation with the same settings.
For example, in the "Weight Transfer" function, you need to select the objects (group) to be transferred and then make the source object active and execute it. However, after the first execution, you can transfer the weights using the previous settings by simply selecting the object to be transferred.
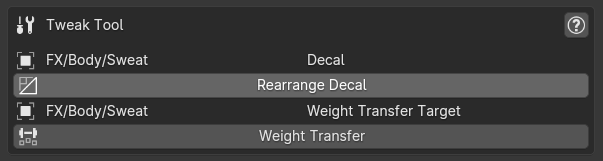
Some features that support "Redo" mode have shortcut buttons in the "Adjustment Tool" on the side panel when the target object is active.
"Redo" in Rigging Helpers
In functions that add auxiliary bones or rig functions to the target, you can reuse the same settings to recreate the bones in the same position. This is useful when the bones are misaligned due to manual editing of the bone positions.
Help for Each Feature
Sakura Tools contains detailed explanations for each feature. Click the help button [?] next to each feature button to display the explanation for that feature. Also, the setting screen for operators that perform complex operations may have a help button.
Please refer to the help for each feature for specific usage and details.
Note
Some operators that provide simple functions may not have help available.
Feature Highlights
Many features of Sakura Tools are designed to make complex and time-consuming operations much easier to perform than they would be traditionally. Here are some of the features that have a significant impact on the workflow.
Please refer to the help for each feature for specific usage and details.
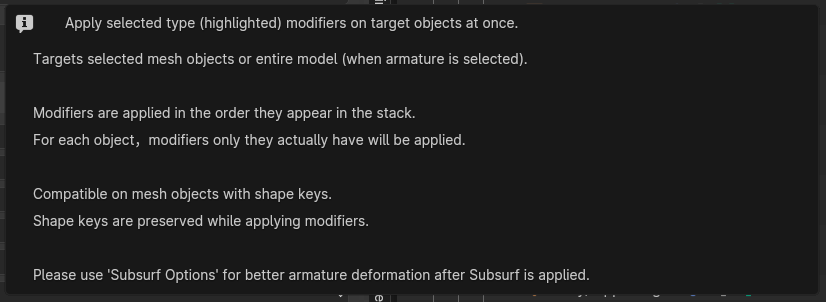
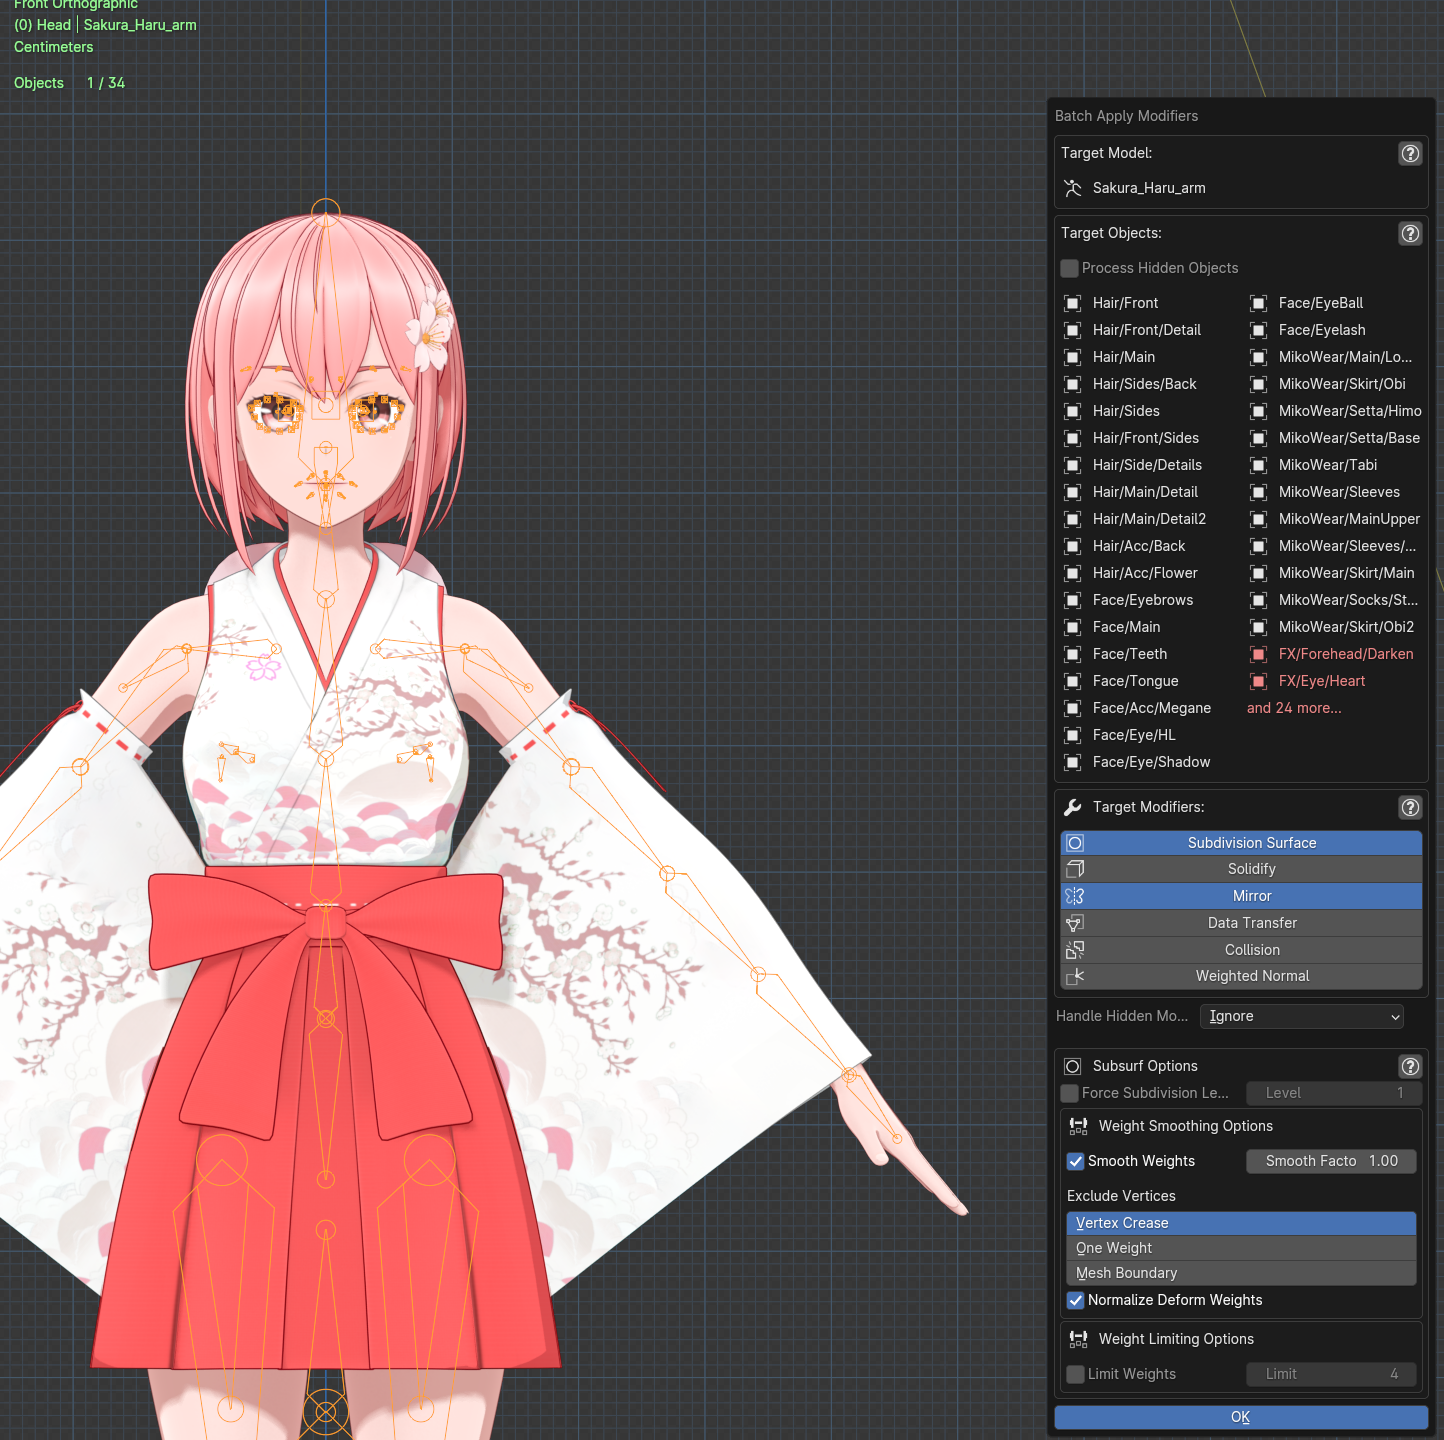
Batch Apply Modifiers
Apply modifiers to multiple objects at once, and it preserves shape keys unlike blender's built-in apply function.
- It's more easy to use many modifiers while modeling.
- For example, using lattce, data transfer, solidify, subsurf etc, on mesh objects which have shape keys.
- You need to apply modifiers on entire model before exporting. With this function, it's done in a few clicks.
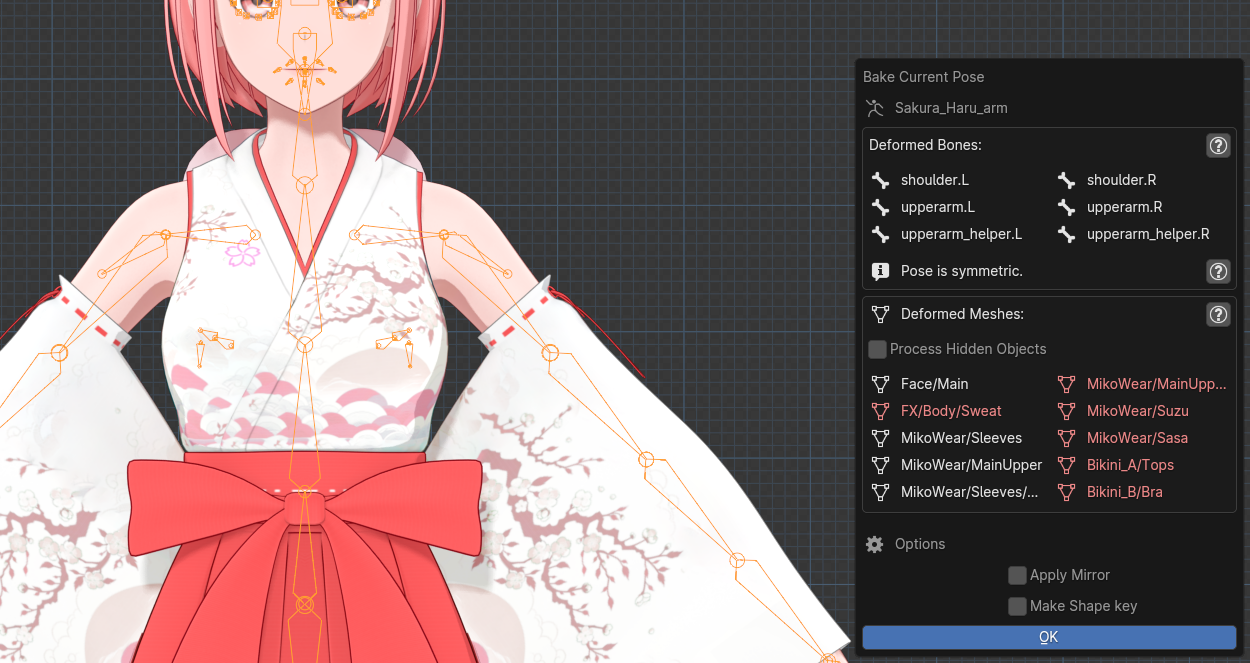
Pose Baking
Make current pose to the new rest pose.
- Such as, make the model (made from many objects) rest pose from T to A. It's done in a few seconds.
- Use armature defrom for modeling. Tweak length of rimbs, scale of head, hands, etc all about body shape. Then, make the pose to the new rest pose. It's done.
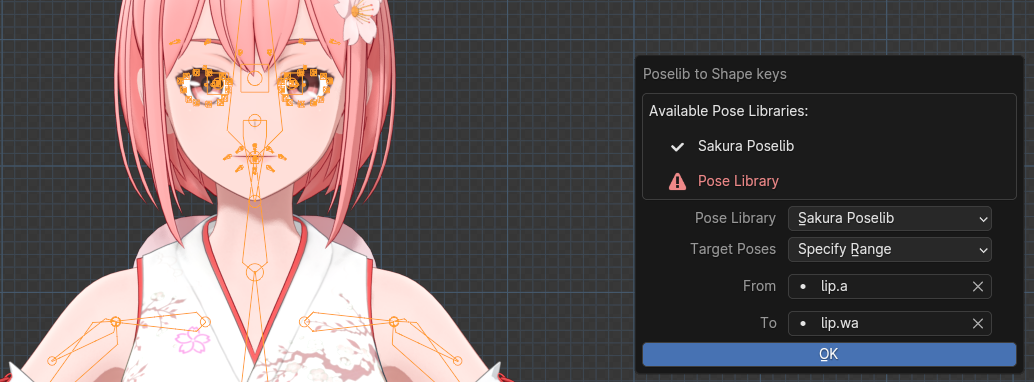
Make Shape keys from Poses
Converts armature poses to shape keys.
- By advaneced deformation detection algorithm, it will make shape keys only on actually deformed mesh objects.
- This function supports advanced batch processing, from multiple poses from pose libraries to multiple object's shape keys.
- Sakura Tools supports Pose Libraries on Blender 3.4 or before, and Sakura Poselib's PoseBook. (Pose Assets on Blender 3.5 or later will be supported in the future.)
Weight Transfer
Very "smart" weight transfer function.
Blender has a built-in weight transfer function, but it's not smart enough. With this function, you can transfer weights very easily and quickly, on neccecery parts on the object.
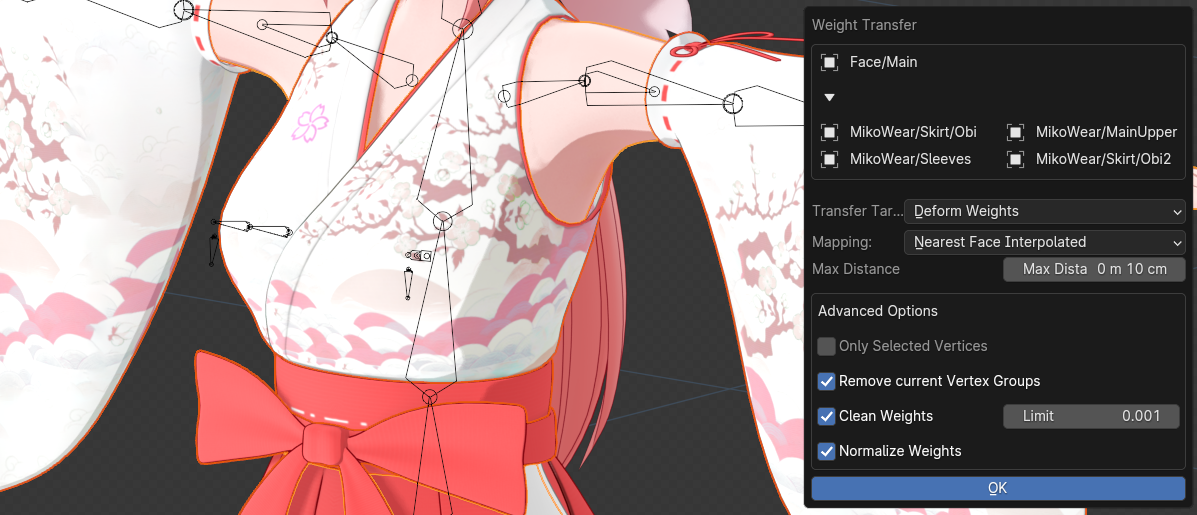
Tip
When you edited base mesh repeatedly, you may want to syncronize the deform weights on covering clothes. It's done in just a few clicks by using "Redo" mode on object that previouly used this function.
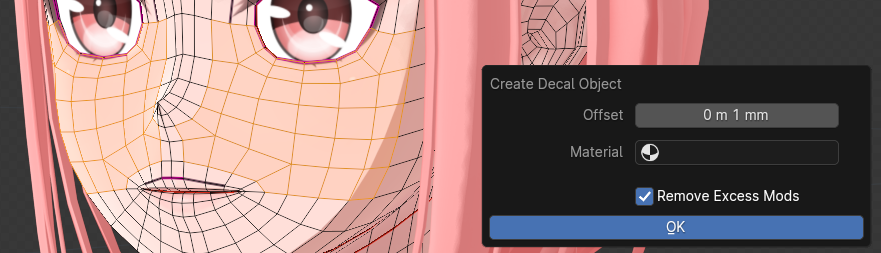
Create/Mange Decal objects
Decal objects are thin, flat objects that are used to add details such as cheeck brushes, tatoo, etc to a model. This function allows you to create and manage decal objects in a few clicks.
- Quickly create decal object from selected faces.
- Rearrange decal objects on modified base mesh, with only one click.
- This function automatically syncronize deform weights along with the base mesh. So you can edit base mesh more freely.
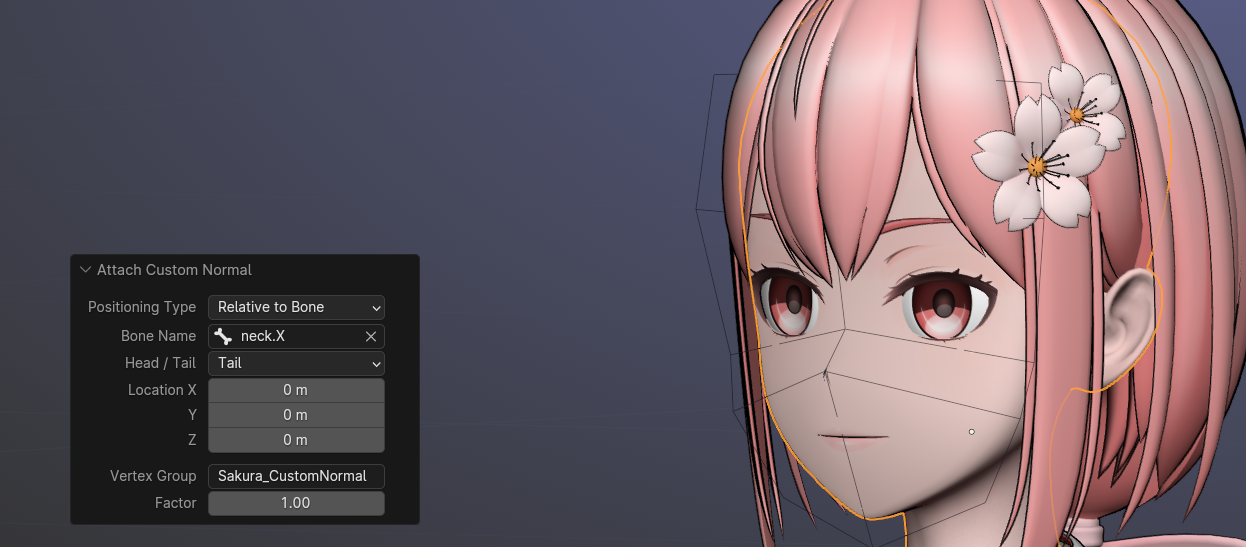
Attach Custom Normal Object
Assigns a custom normal object to the face mesh of the character for more clean shading.
- It uses a method that generally gives good results for almost any character.
- By default, it can be placed in the appropriate place automatically, but it may need adjustment.
- After execution, you need to edit the vertex group of the target object appropriately. Specifically, set the value of the part facing the front to 1.0 and blur the boundary appropriately.

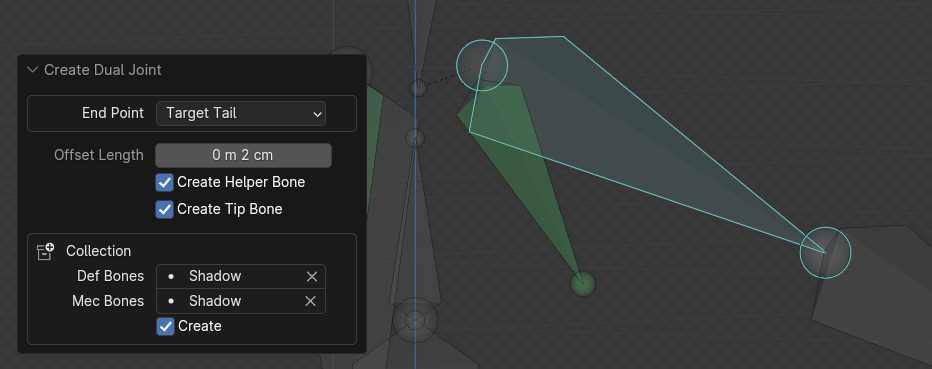
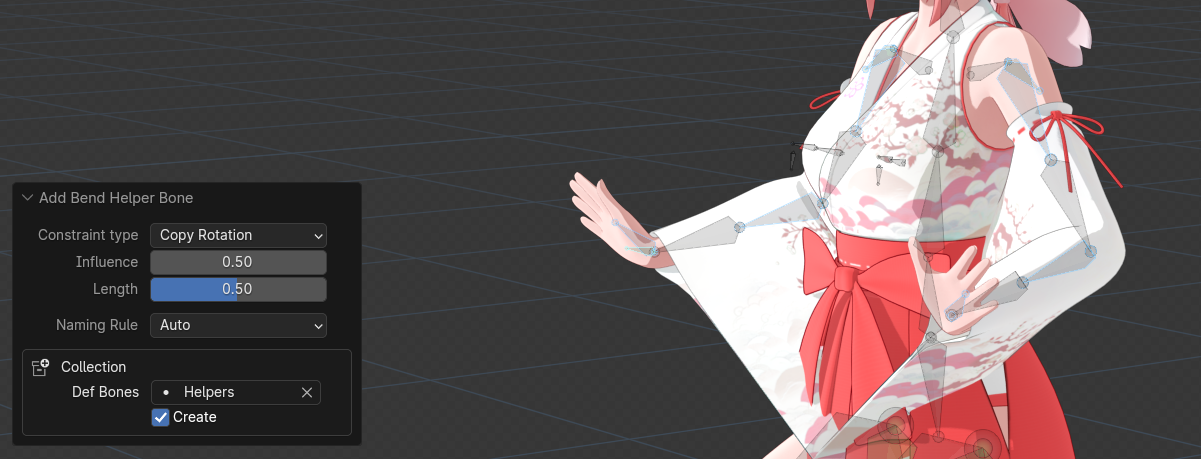
Rig Creation Functions
Create complex but useful rigs such as Twist Rig, Eyelid Rig, Dualjoint Rig, etc.
- These rigs are made to be compatible with other applications such as MMD, Unity, etc.
- For this reason, the rigs are using only basic constraints and drivers.
- Eyelid Rig ensures eyelid bones to move alonng surface of the eye mesh.
- Dual Joint Rig helps to keep volume on the elbow, knee, which has relatively large area and freedom of stretching.
- You can create simple auxiliary bones such as bending helper bone on multiple part at once.
This addon has many other features. Please refer to the help for each feature for specific usage and details.
Plan
- Anime hair creation tools
- Bone creation from selected vertices